
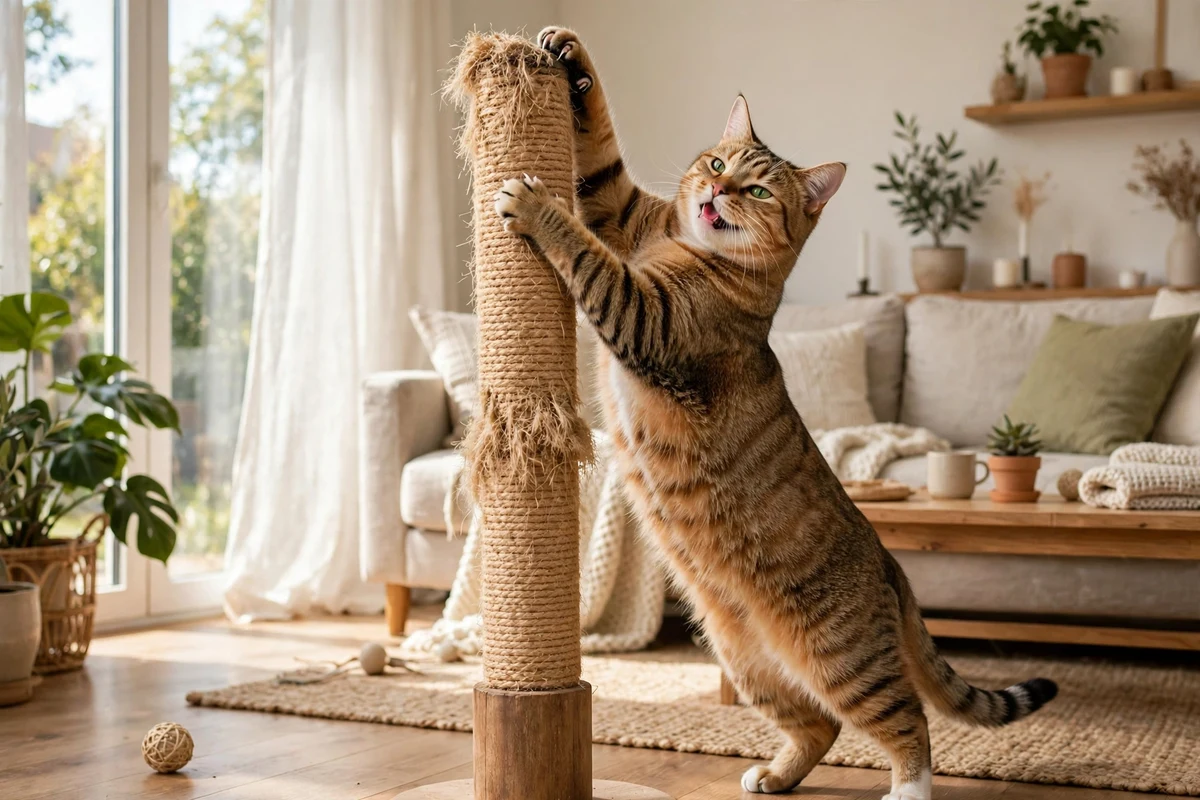
Living Happily with a Clawed Cat
A clawed cat is not a problem to solve. Claws are part of how a cat moves, plays, stretches, climbs, balances and talks to the world. A cat uses its claws to grip a scratching post, to climb to a safe high spot, to hold a toy still while it kicks, and to leave scent marks that tell other cats this place is taken. When those claws shred a sofa or catch your arm during play, the answer is not to remove the claws. The answer is to give them better places to go, to keep them trimmed, and to learn the small handling habits that keep skin and furniture safe. Most owners who switch to that approach find the scratching problem fades within a few weeks, and the cat stays confident and relaxed.
That is the promise of living with a clawed cat. You do not need perfect furniture or thick skin. You need a good post in the right spot, a trim routine your cat tolerates, a play style that keeps hands out of the game, and a home set up so the cat can scratch, climb and rest without choosing your belongings.
This is general information only and is not veterinary advice. If your cat limps, cries when a paw is touched, has a swollen toe, or stops using the litter box after a claw injury, contact your vet rather than treating it at home.
Key Takeaways
- Claws are tools, not weapons. Scratching stretches muscles, sheds old claw layers, and leaves scent marks. Work with the instinct instead of fighting it.
- Trim the front claws every 2 to 4 weeks. A short claw still scratches, but it does far less damage to skin and fabric.
- Put a sturdy post beside every favourite scratching spot. A post your cat ignores is usually in the wrong place, too short, wobbly, or covered in the wrong material.
- Never use your hands as toys. Hands teach a cat that skin is something to grab and kick. Wand toys and thrown toys keep play safe.
- Reward the scratch your cat gives the post, at once, with a treat or praise. Punishment, shouting and spray bottles raise stress and usually make scratching worse. See how to stop unwanted cat behaviors for the reward based approach that works instead.
- Nail caps are a useful short term aid for indoor cats. They are not a fix for a missing post, a bored cat, or a cat that has never been taught where to scratch.
- Declawing removes the last bone of each toe. It is banned for non medical reasons in several states and many cities, and most vets now advise against it.
- Senior cats need closer claw checks. Older claws can grow thick, stop retracting fully, and catch on fabric.
Why Cats Need Their Claws
A cat’s claw is not a fingernail. Each claw grows from the last bone of the toe, and the cat can extend it or pull it back with tendons in the paw. When a cat walks, the claws stay tucked away so the soft paw pads take the weight. When a cat climbs, hunts or stretches, the claws come out and grip. That grip is what lets a cat climb a tree, hold a toy, and land safely after a jump. Without claws, a cat loses balance, grip and confidence, and has to change how it walks.
Scratching does four jobs at once. First, it stretches the muscles of the shoulders, back and legs, which is why cats often scratch hard just after waking up. Second, it sheds the worn outer layer of each claw, leaving a fresh sharp point underneath. That is the opposite of what many owners expect: scratching does not dull claws, it sharpens them. Third, scent glands between the toes leave a mark that other cats can smell, so scratching is also a message. Fourth, it releases tension. A stressed cat scratches more, and a bored cat scratches more too. When you see heavy scratching, the cat is often telling you something about its day, not trying to ruin your furniture.
What Declawing Really Is
Declawing is often described as a nail removal, but it is an amputation. The surgery, called an onychectomy, removes the last bone of each toe along with the claw. It is comparable to cutting off a human finger at the last joint. The surgery is painful, recovery takes weeks, and some cats develop lasting problems afterwards, including chronic pain, nerve damage, changed gait, back pain, litter box avoidance and increased biting. Not every declawed cat develops these problems, but the risk is real enough that the American Veterinary Medical Association strongly discourages the surgery unless it is medically necessary, and the American Animal Hospital Association strongly opposes elective declawing.
The law is moving in the same direction. As of 2026, several US states ban elective declawing, including New York, Maryland, Virginia, Massachusetts, Rhode Island and California, with California’s statewide law taking effect on January 1, 2026. Washington DC has a ban too, and many cities have their own, including Los Angeles, San Francisco, Denver, Austin, Pittsburgh and Madison. Every ban keeps an exception for genuine medical need, such as a tumour or a serious infection in the toe. Most states still allow the surgery, so check the law where you live before assuming anything.
The practical point is simple. Declawing does not fix scratching behaviour. It removes the tool while leaving the drive behind, and it can create new problems that are harder to live with than a scratched sofa arm. The methods below work better, cost less, and leave the cat whole.
The Trim Routine: The Single Most Useful Habit
Regular trimming is the habit that changes daily life fastest. A trimmed claw is shorter and blunter, so it catches less on fabric and breaks skin less easily. Most cats need a trim every 2 to 4 weeks. Kittens may need it more often because their claws grow fast and stay needle sharp. Indoor cats usually need trims more often than outdoor cats, because outdoor cats wear their claws down on rough surfaces.
Use proper cat nail clippers, either the small scissor type or the guillotine type, whichever feels steadier in your hand. Human nail clippers can crush a cat’s claw rather than cutting it cleanly, so they are a poor choice. Keep a small pot of styptic powder nearby. It stops bleeding fast if you ever nick the quick, and having it ready keeps you calm, which keeps the cat calm.
The quick is the pink strip inside the claw that carries blood and nerves. On a light coloured claw you can see it clearly. On a dark claw you cannot, so trim only the sharp tip and stop early. Cut at a slight angle across the tip, taking off just the curved point, about 1 to 2 millimetres. If you are unsure, take less. A small trim every two weeks beats a big trim every two months, because the cat gets used to the routine and you never have to guess how much is safe.
Build tolerance slowly if your cat hates having its paws handled. For the first few days, just touch the paws during calm cuddle time and give a treat. Then press gently on a paw pad so one claw extends, treat, and let go. Then trim one claw, treat, and stop for the day. Many owners trim two or three claws per session at first and finish the rest the next day. There is no rule that all claws must be done at once. A cat that learns that paw handling ends with a treat will sit still far sooner than a cat that is wrapped in a towel and fought with.
Do the front paws first, because those do almost all the damage to furniture and skin. Back claws matter too, but they are used less for scratching furniture and more for grip and kicking during play. Trim them when the cat is relaxed, and take care: back claws are often darker and the quick is harder to see, so take only the tip.
If you nick the quick, stay calm. Press styptic powder onto the tip and hold it for a few seconds. The bleeding usually stops quickly. Give the cat a treat and stop for the day. A single nick does not ruin the routine, but a panicked reaction can make the cat dread the next session, so keep your voice and hands steady.
Some cats will never accept home trimming, and that is fine. Many vets and groomers offer quick nail trims for a small fee, and some will show you the technique on your own cat so you can practise at home. Ask your vet to demonstrate on the next visit. A trim every few weeks at the clinic still beats no trim at all.
Scratching Posts That Actually Get Used
Most unused scratching posts fail for a fixable reason. The post is too short, it wobbles, it is covered in a material the cat dislikes, or it stands in a corner the cat never visits. Cats scratch where they already spend time, so the post must go to the cat, not the other way round. Put one beside the sofa arm your cat already scratches, one near the bed, and one near the cat’s favourite sleeping spot. Three posts in a small home is a reasonable start, and a tall cat tree with sisal wrapped posts can count as one of them.
Height matters. A post should be tall enough for the cat to stretch up fully with front paws extended, which usually means at least 60 to 90 centimetres for an adult cat. A short post forces a cramped scratch that feels wrong, so the cat goes back to the tall sofa arm. Stability matters just as much. If the post tips or slides when the cat leans into it, the cat will not trust it again. Choose a heavy base or fix the post to a wall.
Material matters too, and cats have opinions. Sisal rope is the most popular choice, and many cats love it. Cardboard scratchers are cheap, work well flat on the floor, and suit cats that prefer a horizontal scratch. Carpet covered posts appeal to some cats and confuse others, because a cat that learns carpet is fine to scratch may not understand why the living room carpet is different. Wood is a good option for cats that like a firm surface. Offer two different materials and watch which one your cat chooses. That choice tells you what to buy next.
Orientation matters as well. Some cats scratch vertically, stretching up a post or a tree trunk. Others prefer to scratch flat on the floor, raking at a cardboard pad. Watch your cat’s natural style and match it. A cat that scratches the rug needs a flat pad. A cat that scratches the sofa arm needs a tall vertical post in exactly that spot.
To teach the post, make it rewarding. Rub a little catnip on it, or dangle a toy over it so the cat’s paws land on the sisal. When the cat scratches the post, praise it and offer a treat at once. Timing matters: a treat given within a few seconds of the scratch teaches far more than a treat given a minute later.
Protect the furniture while the habit forms. Double sided sticky tape made for cats works well on sofa arms and chair legs. It feels unpleasant on paws but does no harm, and most cats stop trying the taped spot within days. Washable throws and slipcovers protect fabric and can be removed once the new habit is solid. Keep the tape and covers on for at least two to three weeks after the cat starts using the post reliably, because removing them too early invites a relapse. Our guide to why cats scratch the furniture explains what draws them to a spot in the first place.
Nail Caps: A Useful Short Term Aid
Soft nail caps are small vinyl covers glued over each claw. They blunt the tip so the cat can scratch, climb and retract its claws normally without tearing fabric or skin. They usually stay on for 4 to 6 weeks, then fall off as the claw grows and sheds, and a new set can be applied. Many vets will apply the first set and show you how to do it at home.
Playing Safely With a Clawed Cat
Most scratches on people happen during play, not aggression. The pattern is familiar: fingers wiggle under a blanket, the cat pounces, claws come out, and someone gets scratched. The fix is to keep hands out of the game entirely. Use wand toys, fishing rod toys, balls, and toys you can throw. Your hands should deliver food, treats and gentle petting, and nothing else that moves fast.
Learn the signs of an overstimulated cat. A tail that starts swishing hard, ears that flatten or rotate back, skin twitching along the back, dilated pupils, and a sudden freeze are all signals to stop. Many cats give a warning nip or a grab before a full scratch. If you see those signals, stop the game calmly, let the cat walk away, and wait. Chasing the cat for more play after it has signalled enough is how most play scratches happen.
Keep play sessions short and frequent: 10 to 15 minutes, two or three times a day, suits most adult cats. Put wand toys away between sessions so the cat does not practise grabbing them unsupervised. Our guide to playing with your cat the right way covers toy choices and session length in detail.
If your cat grabs your hand during play, go still instead of pulling away. Pulling away triggers the chase instinct and the claws dig in harder. A still hand is boring, and the cat usually lets go within a few seconds. Then calmly withdraw your hand, wait for the cat to settle, and redirect to a toy. Never hit, shake or shout at a cat for scratching during play. Punishment teaches the cat to fear your hands, and a frightened cat scratches more, not less.
Living With Children and a Clawed Cat
Children and clawed cats can live happily together when the adults set the rules. Teach children that a cat is not a toy and that the cat decides when cuddles happen. Show them how to stroke gently along the back and cheeks, and how to stop the moment the cat’s tail starts swishing or the ears go back. A simple rule works well: if the tail moves fast, hands come off.
Give the cat an escape route in every room the children use. A high perch, a cat tree, or a room with a door the cat can slip through gives the cat a choice, and a cat with a choice rarely scratches. Never let a child chase a cat, corner it, or pull it out of a hiding place. A cornered cat is a scratching cat, and the child learns fear while the cat learns that children are a threat.
Renters: Protecting Your Deposit
Renters worry about deposits, and a clawed cat in a rental needs a little extra planning. Before the cat arrives, check the lease for pet clauses and get permission in writing if the lease requires it. Photograph the furniture, carpets, door frames and window sills on moving day so you have a record of what was already marked.
Use washable slipcovers on sofas and chairs, and put double sided tape on the arms and legs of any furniture you do not own. Place a tall scratching post beside each piece of furniture the cat likes, and keep a cardboard scratcher near the front door, where many cats scratch when they greet you. Keep the litter box away from carpeted areas where possible, and use a large mat under the box to catch stray litter and scratches.
Senior Cats and Changing Claws
Older cats need closer claw care. As cats age, their claws can grow thicker and more brittle, and some cats stop retracting their claws fully. A claw that stays out catches on blankets, carpets and clothing, and can tear or snag. Check an older cat’s paws every week, trim a little more often, and look for claws that curve inward toward the pad, which can happen when an old cat stops scratching as much.
When Scratching Signals a Problem
Most scratching is normal, but a sudden change deserves attention. A cat that starts scratching far more than usual, scratches one spot raw, overgrooms its paws, limps, or cries when a paw is touched may be stressed, in pain, or unwell. New scratching after a house move, a new pet, a new baby or building work often points to stress. A pheromone diffuser may help in those weeks, and keeping the cat’s routine steady matters more than any product.
A Calm Home With Claws
Living happily with a clawed cat is not about winning a battle with the furniture. It is about giving the cat what it needs: a place to scratch, a place to climb, a place to hide, a trim every few weeks, and play that keeps hands safe. Do those five things steadily, and the scratched sofa becomes a short phase rather than a permanent feature of the house.